Tutorial #55
Made in Photoshop 7.0, not translatable
Requested by Glenst0rm
Going from this:  to this:
PM me if you have any questions!
~Wunder

"The task of the modern educator is not to cut down jungles but to irrigate deserts." ~ C. S. Lewis, The Abolition of Man
Forum 1.0: 1303 posts
WC: 68
Tutorial #56
Made in Photoshop 7.0, translatable
Requested by sweeetlilgurlie
Going from this:  to this:
PM me if you have any questions!
~Wunder

"The task of the modern educator is not to cut down jungles but to irrigate deserts." ~ C. S. Lewis, The Abolition of Man
Forum 1.0: 1303 posts
WC: 68
Tutorial #57
Made in Photoshop 7.0, translatable
Requested by sweeetlilgurlie
Going from this:  to this:
PM me if you have any questions!
~Wunder

"The task of the modern educator is not to cut down jungles but to irrigate deserts." ~ C. S. Lewis, The Abolition of Man
Forum 1.0: 1303 posts
WC: 68
Tutorial #85 - This:  to this:
  recreating this:
 ![]() using Gimp. Translatable.
using Gimp. Translatable.
Requested by lover of narnia.
I hope this is accurate enough. 
Open and prep image/base.
Open and prep image/base (crop, scale, etc.).
Duplicate your base layer and set it to Soft Light at 100%.
Duplicate your base layer again, bring it to the top and set it to Screen at 100%.
Flatten your image.
Duplicate your base layer and set it to Screen at 50%.
Flatten your image again.
Add this:  set to Soft Light at 100%.
Add this:  set to Soft Light at 50%.
Add this:  set to Lighten Only at 100%.
Add this:  set to Screen at 100%.
Flatten your image.
Go to Filters>Enhance>Sharpen and sharpen the image to your liking.
You're done!
Please do not copy exactly.
--- flambeau
President of the Manalive Conspiracy
Founder of Team Hoodie
Icon by me
Tutorial #58
Made in Photoshop 7.0, not translatable
Requested by LucyP0104
Going from this:  to this:
PM me if you have any questions!
~Wunder

"The task of the modern educator is not to cut down jungles but to irrigate deserts." ~ C. S. Lewis, The Abolition of Man
Forum 1.0: 1303 posts
WC: 68
Tutorial #59
Made in Photoshop 7.0, not translatable
Requested by LucyP0104
Going from this:  to this:
PM me if you have any questions!
~Wunder

"The task of the modern educator is not to cut down jungles but to irrigate deserts." ~ C. S. Lewis, The Abolition of Man
Forum 1.0: 1303 posts
WC: 68
Tutorial #60
Made in Photoshop 7.0, not translatable
Requested by LucyP0104
Going from this:  to this:
PM me if you have any questions!
Yay! *throws confetti* my 60th tutorial! 
~Wunder

"The task of the modern educator is not to cut down jungles but to irrigate deserts." ~ C. S. Lewis, The Abolition of Man
Forum 1.0: 1303 posts
WC: 68
Tutorial #61
Made in Photoshop 7.0, not translatable
Requested by lover of narnia
Going from this:  to this:
PM me if you have any questions!
~Wunder

"The task of the modern educator is not to cut down jungles but to irrigate deserts." ~ C. S. Lewis, The Abolition of Man
Forum 1.0: 1303 posts
WC: 68
Tutorial #62
Made in Photoshop 7.0, not translatable
Requested by lover of narnia
Going from this:  to this:
PM me if you have any questions!
~Wunder

"The task of the modern educator is not to cut down jungles but to irrigate deserts." ~ C. S. Lewis, The Abolition of Man
Forum 1.0: 1303 posts
WC: 68
VFK's sixth tutorial in GIMP 2.6
How to go from this:  to this:
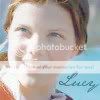
1: Take your base, duplicate it, colors>auto>white balance. Set to Screen at 100% opacity.
2: Flatten.
3: Duplicate base again, set to screen at 30% opacity.
4: Flatten.
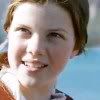
5: Duplicate base AGAIN and go to colors>components> channel mixer and insert these settings.
Output channel:Red
-10
-20
10
Output Channel : Blue
30
Set that layer to soft light at 50%.
6: Flatten.

Now we're going to add a texture:
7: Add this one by me:  flip it horizontally and set it to soft light at 50% opacity.
Flatten.
8: Now you're going to duplicate the base layer and desaturate and invert it. Set that layer to overlay at 100%
9: Flatten.
10: Now, add a new transparent layer. (ctrl+shift+n) and zoom in heavily on your image. Specifically on her eyes. Using the color 0773b1 and a very small brush, paint over the iris' of her eyes. Set this transparent layer with the blue paint to color at 60% opacity. Her eyes are blue now 
11: Now we're almost done. Make a new transparent layer and put a big fuzzy white dot in the middle of the image. Go to filters>blur>gausian blur and blur it with a radius of 69. Set it to screen at 50%.
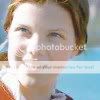
12: Flatten
13: Last step I promise. Duplicate your base layer and go to colors> levels and input these settings.
Value Channel:
Input Levels: 3, 1.14, 242
Output Levels: 0, 247
Red Channel:
Input Levels: 47, 1.25, 255
Output Levels: 35, 232
Green Channel:
Input Levels: 25, 1.23, 248
Output Levels: 11, 239
Blue Channel:
Input Levels: 0, 1.83, 232
Output Levels: 100, 160
Click okay.
Set it to screen at thirty percent.
Then I added one last texture which is optional,  , blurred it as much as I possible could with the blur tool in the toolbox, rotated it ninety degrees to the right and set it on multiply at 20% ^_^.
You're done.

Go ahead and add anything anything you want, please don't copy exactly. Hope you had fun, I know I did ^_^
The only other thing I did was add text.  I can't wait to see what you guys come up with.
~VFK~
Tutorial #63
Made in Photoshop 7.0, not translatable
Requested by lover of narnia
Going from this:  to this:
PM me if you have any questions!
~Wunder

"The task of the modern educator is not to cut down jungles but to irrigate deserts." ~ C. S. Lewis, The Abolition of Man
Forum 1.0: 1303 posts
WC: 68
Tutorial #64
Made in Photoshop 7.0, not translatable
Requested by Adeona
Going from this:  to this:
PM me if you have any questions!
~Wunder

"The task of the modern educator is not to cut down jungles but to irrigate deserts." ~ C. S. Lewis, The Abolition of Man
Forum 1.0: 1303 posts
WC: 68
Tutorial #86 - This: 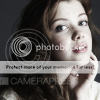 to this:
 ![]() using Gimp. Translatable.
using Gimp. Translatable.
Requested by lover of narnia.
Open and prep image/base (crop, scale, etc.). 
Go to Colors>Color Balance and input these settings...
Shadows: +10, +5, +5.
Midtones: +15, -10, -25.
Highlights: -5, +5, +5.
Preserve Luminosity unchecked.
Click okay.
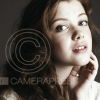
Go to Colors>Components>Channel Mixer and input these settings...
Duplicate that layer, and go back to Channel Mixer again. Don't change any of the settings, just uncheck Preserve Luminosity. Lower the opacity of that layer to 35%.
Now, duplicate that layer (the one you just did the second channel mixer on) and set it on Screen at 25%. Add a layer mask, and copy and paste the background layer into it. Invert the layer mask (Colors>Invert).
Duplicate that layer (the one with the layer mask) and set it on Soft Light at 25%.
Duplicate that layer one more time (the layer mask one again), and set it on Screen at 100%.
Flatten your image.
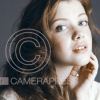
Go to Colors>Levels, and input these settings...
Value: 25, 1.25, 250 | 0, 245.
If you have more than one layer, flatten your image.
At this point, I did some smudging and cloning and took out the watermark, as well as sharpened the image and lightly blurred her skin. I also blurred the background.
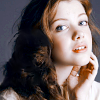
Duplicate your base and set it to Screen at 25%. Add a layer mask, and copy and paste the background layer into it. Invert the layer mask (Colors>Invert).
Add this:  set to Soft Light at 25%.
Add this:  set to Soft Light at 100%.
Flatten your image.
At this point, I did a little bit more Hue-Saturation, and added a couple smokey/lighten textures to give it a bit more something. I ended up with this...
![]()
Add whatever else you want! You're done! 
Results may vary.
Please do not copy exactly.
--- flambeau
President of the Manalive Conspiracy
Founder of Team Hoodie
Icon by me
Tutorial #33: Made with GIMP. Translatable.
How to get this: ![]() From this:
From this: ![]()
A recreation of this: ![]()
Requested by WunderLu. 
Open your image, crop, scale, inflate...forget that last one.
Duplicate the base layer, add a layer of #f6bfc7, and set it on Value (@ 100%), merge down into the duplicated layer, set the merged layer on Soft Light at 100%.
Now, add two layers, fill them with #f6dcdc and #dcedf6, and set them both on Burn at 50%.
Add three layers of #000d2f and set them on Screen (@ 100%), Screen (@ 65%) and Subtract (@ 100%).
Flatten all the layers.
Sharpen your image.
Go to Colors>Color Balance:
Shadows: +4, 0, 0
Midtones: 0, +6, 0
Highlights: -5, +7, +10
Click 'ok'.
Time for textures!
Set all of these on Screen, and move them to wherever you think they look the bestest. 
This one: 
Zis von: 
Here, too: 
Almost done: 
Add a layer of #404040 on Lighten Only at 25%.
Last one:  Set it on Soft Light. Use the blend tool to blend it to where it only show up on the top of the icon.
You're done!  It isn't a perfect recreation, but I hope it's close enough.
Tutorial #34: How to get this: ![]() From this:
From this: ![]()
A recreation of this: ![]()
Also requested by WunderLu. 
In the beginning was the image, and the image was without coloring, and the image was dark...Sorry!  Anyway...
Open your image/base. Crop and scale, if necessary.
Duplicate your base layer, go to Colors>Curves
Value: x:131, y:176
Red: x:131, y:142
Green: x:99, y:110
Blue: x:98, y:104
Click 'ok'.
Duplicate that layer, go to Colors>Channel Mixer.
The recreation turned out a little more red than the original, but I hope that's okay.
Let me know if you have any questions about either of these. 
~Djaq
When things fall apart, be glue.
Team Hoodie!!
Tutorial #87 - This:  to this:
 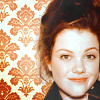 recreating this:
 ![]() using Gimp. Translatable.
using Gimp. Translatable.
Requested by lover of narnia.
Open and prep image/base (crop, scale, etc.). 
Go to Colors>Color Balance and input these settings...
Shadows: +10, +5, +5.
Midtones: +15, -10, -25.
Highlights: -5, +5, +5.
Preserve Luminosity unchecked.
Click okay.
Go to Colors>Components>Channel Mixer and input these settings...
Click okay.
Go to Colors>Hue-Saturation and set the Master saturation to +65.
Go to Colors>Color Balance and input these settings...
Shadows: 0, 0, 0.
Midtones: +10, 0, -10.
Highlights: 0, 0, -5.
Preserve Luminosity unchecked.
Click okay.

I decided to add a little flair. Time for some textures! 
Add this: 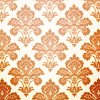 (by innocent Lexys) set it to Darken Only at 100%, and erase the parts that cover her face.
Add this:  set it to Soft Light at 100%.
Flatten your image.
Go to Colors>Brightness-Contrast, and set both Brightness and Contrast to +5.
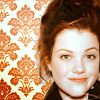
Add this:  set it to Lighten Only at 100%. Flip it vertically.
Add this:  set it to Screen at 100%. Erase the parts on her face.

Add whatever else you want! You're done!
Please do not copy exactly.
--- flambeau
President of the Manalive Conspiracy
Founder of Team Hoodie
Icon by me

